Tuesday, June 14, 2011
Taking a Vote!
Taking a Vote!
Monday, June 13, 2011
Fleas!
Brass ram candlesticks {we got a pair.}
We always get TONS of brass at the flea market.
This bottle is "allegedly" from the 1890's and "allegedly" was used to hold poison. Not sure if I buy that, but I bought it anyway. It lives next to my big "S" - a previous flea market find.
I didn't take these all home with me, but I just loved this table of glass bottles. I'd love to fill a white bathroom with them!
My feet are still achin' from all that flea market walkin'. Time for a pedicure!
Fleas!
Brass ram candlesticks {we got a pair.}
We always get TONS of brass at the flea market.
This bottle is "allegedly" from the 1890's and "allegedly" was used to hold poison. Not sure if I buy that, but I bought it anyway. It lives next to my big "S" - a previous flea market find.
I didn't take these all home with me, but I just loved this table of glass bottles. I'd love to fill a white bathroom with them!
My feet are still achin' from all that flea market walkin'. Time for a pedicure!
Friday, June 10, 2011
PATRIOTIC MAP {Craft}
I have an antique hutch on my front patio that my neighbor gave to me after it didn’t sell for $30 at a garage sale she had! I LOVE LOVE LOVE it! I have started trying to decorate it for seasons and holidays. But, I am a cheapskate so I don’t like to go buy things for it! Anyway, I am trying to decorate it for 4th of July. I have very few Americana decorations. So, I thought I should make some things to go on it.
Well, another thing about me is that I am a lazy and impatient crafter. I love to create and craft, but only things that don’t take too long. A couple hours is about my max for a project. I prefer quick and easy projects. I am also VERY impatient when I am making something. I HATE having to wait for paint or glue to dry. I don’t like to stop to clean up. Once I start something I just want to go, go, go ‘til it is done!
Ok, onto the subject of this post:
Sorry there’s a bit of a glare so the FREE is a bit hard to see. But, I found a printable for this map graphic on I Heart Naptime! You can find it HERE. I printed it out on my printer and then I took some little scissors and carefully cut out the map. I happened to have the perfect size piece of birch plywood in the garage….a scrap from a bed my son built in woodshop. I took that piece of wood and painted the edges red with acrylic craft paint.
Then, I took a piece of this navy star fabric and cut it a little bigger than the wood. I wanted to make the fabric look a little old, so I took some sandpaper to the surface. See how it changed it? The left side is normal, the right is sanded. It is a printed fabric (the color is on the top only).
Then I applied ModPodge to the surface of the wood and placed the sanded fabric on it, using a credit card type tool to rub it down and press it to the wood well. I let that dry for a bit while I took some fine sandpaper to the map to make it look a little less perfect. Then I used my finger to add some distress ink to the paper to make the edges brown and dull down the white of the areas I had sanded.
Next, I turned over the wood onto a cutting mat and used a sharp Xacto knife to trim the excess fabric. I then flipped it back over and applied a layer of ModPodge to the fabric face. While it was still wet, I placed the map onto it and pressed it down with the credit card again. If you don’t want a distressed look be careful pressing it down because I noticed it scratched it a couple times.
Now, a GOOD and PATIENT crafter would have let that dry completely. But because I am NOT that good and patient crafter I let it dry for about 10 minutes and then applied my final coat of ModPodge to the map face. Unfortunately, that cause it to bubble in 3 or 4 places. I poked those places with a pin and pressed the air out. I don’t think anyone can notice it now but it was just a hassle.
Once it was dry I sprayed it with a coat of clear spray paint to eliminate the tackiness of the ModPodge.
All in all, it was a fast and easy project and I am really happy with how it came out!
PATRIOTIC MAP {Craft}
I have an antique hutch on my front patio that my neighbor gave to me after it didn’t sell for $30 at a garage sale she had! I LOVE LOVE LOVE it! I have started trying to decorate it for seasons and holidays. But, I am a cheapskate so I don’t like to go buy things for it! Anyway, I am trying to decorate it for 4th of July. I have very few Americana decorations. So, I thought I should make some things to go on it.
Well, another thing about me is that I am a lazy and impatient crafter. I love to create and craft, but only things that don’t take too long. A couple hours is about my max for a project. I prefer quick and easy projects. I am also VERY impatient when I am making something. I HATE having to wait for paint or glue to dry. I don’t like to stop to clean up. Once I start something I just want to go, go, go ‘til it is done!
Ok, onto the subject of this post:
Sorry there’s a bit of a glare so the FREE is a bit hard to see. But, I found a printable for this map graphic on I Heart Naptime! You can find it HERE. I printed it out on my printer and then I took some little scissors and carefully cut out the map. I happened to have the perfect size piece of birch plywood in the garage….a scrap from a bed my son built in woodshop. I took that piece of wood and painted the edges red with acrylic craft paint.
Then, I took a piece of this navy star fabric and cut it a little bigger than the wood. I wanted to make the fabric look a little old, so I took some sandpaper to the surface. See how it changed it? The left side is normal, the right is sanded. It is a printed fabric (the color is on the top only).
Then I applied ModPodge to the surface of the wood and placed the sanded fabric on it, using a credit card type tool to rub it down and press it to the wood well. I let that dry for a bit while I took some fine sandpaper to the map to make it look a little less perfect. Then I used my finger to add some distress ink to the paper to make the edges brown and dull down the white of the areas I had sanded.
Next, I turned over the wood onto a cutting mat and used a sharp Xacto knife to trim the excess fabric. I then flipped it back over and applied a layer of ModPodge to the fabric face. While it was still wet, I placed the map onto it and pressed it down with the credit card again. If you don’t want a distressed look be careful pressing it down because I noticed it scratched it a couple times.
Now, a GOOD and PATIENT crafter would have let that dry completely. But because I am NOT that good and patient crafter I let it dry for about 10 minutes and then applied my final coat of ModPodge to the map face. Unfortunately, that cause it to bubble in 3 or 4 places. I poked those places with a pin and pressed the air out. I don’t think anyone can notice it now but it was just a hassle.
Once it was dry I sprayed it with a coat of clear spray paint to eliminate the tackiness of the ModPodge.
All in all, it was a fast and easy project and I am really happy with how it came out!
Thursday, June 2, 2011
BEST. SUMMER. EVER. {Paper Craft}
We have a wall in our stairwell. Years ago we followed a tradition of my husband’s family and created a picture wall on that blank space. The picture wall was just hundreds of snapshots stapled to the wall so that they overlapped. There were a few enlargements as well. We would put up pictures of our friends and family and cute shots of our kid or pictures of memorable events. It was fun. But I got tired of it having no rhyme or reason.
So, I decided the pictures needed a frame to go in. So, down came the pictures. I got some molding to make a frame, but was too afraid to attempt it on my own. So, maybe a year later my younger sister Jennifer, who is very handy and knows how to build things, came into town and helped me get the frame up. After that I just needed to fill the nail holes and paint it and then re-hang the pictures. Well, 4 or 5 years later I still haven’t gotten it done! This is the story of my life. We lived without a sink in our downstairs bathroom for about 4 years because it took me that long to complete the project of a vessel sink made from a bowl on a little antique dresser.
Anyway, since I never painted the frame and put the pictures back up, this space has been used for some different things. Currently, it is housing our SUMMER TO-DO LIST, which is the main topic of this post! Here it is!
I cut 12x12 paper (this is from Wal-Mart) into quarters so I had 6x6 squares. Then I made 4x4 squares with the activities printed in them. I used 8 different fonts. I attached the white squares to the scrapbook paper squares with double stick tape. Originally I was going to do a banner with these, but I got a little carried away and made close to 80 squares! So, the banner would have been longer than my house! So, instead, I used sticky tack to put these up in my frame. They make it look must more cheerful! Don’t mind the old paint. There is also a hole one of my precious boys kicked in the wall when he was mad! Aren’t kids so fun???!!!
Now, I want you to know this is not perfect. Nothing I do ever is! Do they fit in the frame perfectly?? NO. Are the squares perfectly square? NO. Did my printer cut off the border on some of the squares? YES. Do I dislike one of the fonts I chose? YES. But, since I am fighting perfectionism I just let all of these things be. It doesn’t change the fact that we are going to have a super fun summer! My kids are VERY excited about all these activities. I am hoping it keeps them from being complete couch potatoes this summer. But, I must admit I am worried I will not be able to keep up with this plan!!!
For those who might like to see my list more clearly, here it is! ALSO, we will be needing friends to accompany us in some of these activities. So I hope some of my Vegas friends will let me know what they would like to do with us!
BEST. SUMMER. EVER. {Paper Craft}
We have a wall in our stairwell. Years ago we followed a tradition of my husband’s family and created a picture wall on that blank space. The picture wall was just hundreds of snapshots stapled to the wall so that they overlapped. There were a few enlargements as well. We would put up pictures of our friends and family and cute shots of our kid or pictures of memorable events. It was fun. But I got tired of it having no rhyme or reason.
So, I decided the pictures needed a frame to go in. So, down came the pictures. I got some molding to make a frame, but was too afraid to attempt it on my own. So, maybe a year later my younger sister Jennifer, who is very handy and knows how to build things, came into town and helped me get the frame up. After that I just needed to fill the nail holes and paint it and then re-hang the pictures. Well, 4 or 5 years later I still haven’t gotten it done! This is the story of my life. We lived without a sink in our downstairs bathroom for about 4 years because it took me that long to complete the project of a vessel sink made from a bowl on a little antique dresser.
Anyway, since I never painted the frame and put the pictures back up, this space has been used for some different things. Currently, it is housing our SUMMER TO-DO LIST, which is the main topic of this post! Here it is!
I cut 12x12 paper (this is from Wal-Mart) into quarters so I had 6x6 squares. Then I made 4x4 squares with the activities printed in them. I used 8 different fonts. I attached the white squares to the scrapbook paper squares with double stick tape. Originally I was going to do a banner with these, but I got a little carried away and made close to 80 squares! So, the banner would have been longer than my house! So, instead, I used sticky tack to put these up in my frame. They make it look must more cheerful! Don’t mind the old paint. There is also a hole one of my precious boys kicked in the wall when he was mad! Aren’t kids so fun???!!!
Now, I want you to know this is not perfect. Nothing I do ever is! Do they fit in the frame perfectly?? NO. Are the squares perfectly square? NO. Did my printer cut off the border on some of the squares? YES. Do I dislike one of the fonts I chose? YES. But, since I am fighting perfectionism I just let all of these things be. It doesn’t change the fact that we are going to have a super fun summer! My kids are VERY excited about all these activities. I am hoping it keeps them from being complete couch potatoes this summer. But, I must admit I am worried I will not be able to keep up with this plan!!!
For those who might like to see my list more clearly, here it is! ALSO, we will be needing friends to accompany us in some of these activities. So I hope some of my Vegas friends will let me know what they would like to do with us!
Wednesday, June 1, 2011
SUMMER SUBWAY ART {Printable}
I have been looking around for a cute summer subway art printable to put in the frame I have on my entry buffet. Since I haven’t been able to find anything I loved, I decided it was time to try my hand at creating subway art. Here is what I came up with.Isn’t it so cute??? I am really happy with it! I created it in Microsoft Word.
I have decided to use this as a little incentive to get people to become followers of my blog. I hope that’s not rude.
If you would like this printable, just become a follower or email subscriber of ReMarkable Home and then email me to tell me you did and that you would like the file and I will send it to you. My email is remarkablehome@gmail.com
SUMMER SUBWAY ART {Printable}
I have been looking around for a cute summer subway art printable to put in the frame I have on my entry buffet. Since I haven’t been able to find anything I loved, I decided it was time to try my hand at creating subway art. Here is what I came up with.Isn’t it so cute??? I am really happy with it! I created it in Microsoft Word.
I have decided to use this as a little incentive to get people to become followers of my blog. I hope that’s not rude.
If you would like this printable, just become a follower or email subscriber of ReMarkable Home and then email me to tell me you did and that you would like the file and I will send it to you. My email is remarkablehome@gmail.com
Thursday, May 26, 2011
Pinky Pink
I'm currently obsessed with the gold/champagne/pink/white color scheme. I could keep the walls mocha {the wall color we inherited from the previous home owners} since I want to wait until we get to turn that room into a nursery before I choose a color to repaint it. I already own the gold sea urchins from Two's Company that I would mount on the wall, so all I would need is the metallic hide, "A" pillow and pink bow print...
Pinky Pink
I'm currently obsessed with the gold/champagne/pink/white color scheme. I could keep the walls mocha {the wall color we inherited from the previous home owners} since I want to wait until we get to turn that room into a nursery before I choose a color to repaint it. I already own the gold sea urchins from Two's Company that I would mount on the wall, so all I would need is the metallic hide, "A" pillow and pink bow print...
Monday, May 23, 2011
LITTLE MAN BABY SHOWER {Party}
Well, the shower went off without a hitch. I will admit it was a TON of work for me….much more than I anticipated. I was exhausted by the time the party started! But I think all the guests had a nice time and enjoyed themselves and hopefully my sister was happy and felt loved.
So, I am just going to post a ton of pictures from the shower. I had some trouble taking some of the pictures due to the time of day and lighting in the room. Hopefully you will still be able to see all the little details. In the coming days I will post recipes for the food. Enjoy!
How to make this printable HERE
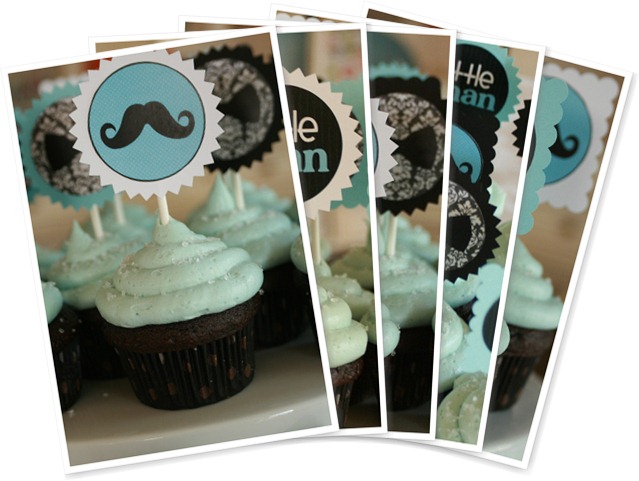
I wanted to do something a little different with the cupcake toppers than I have seen before. So instead of just scalloped circles I did scalloped squares and pinked circles, each in 3 different colors. I love how they turned out! HERE is my tutorial on making cupcake topper graphics.
Cupcakes made by my sister Melinda. We use an icing coupler to pipe the frosting because we could never find a big enough tip. The coupler is the little white thing that makes it so you can switch out the tips on your pastry bag. You have to find one without a little notch in it though.
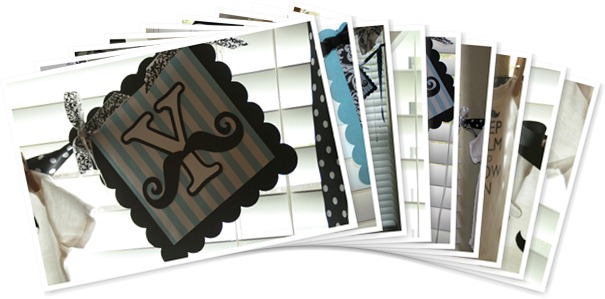
Garland inspired by THIS party.
The onesies were made with heat transfer vinyl I cut on my Silhouette.
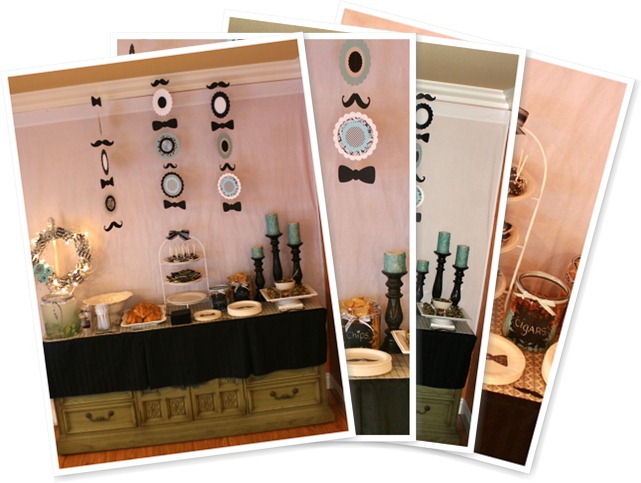
These hanging garlands spun around slowly all night. Here you are seeing the back side of several of the circles. I connected the shapes using clear fishing line and clear tape.
This was a fall colored wreath that I had spray painted white. I added the ribbon and fabric rosettes to match my color scheme. The twinkle lights gave a nice effect during the shower.
Vinyl mustaches on plastic cups.
Stamped paper plates…how to HERE.
Black Bean and Corn Salsa (Made by my sister Molly)
Homemade Chips (made by my sister Molly)
Italian BOWTIE Pasta Salad (Made by my sister Laura)
Cucumber Water (SUPER refreshing!)
Oreo Truffles
Pretzel “Cigars”
Bowtie Sugar Cookies (made with a homemade cookie cutter)
Triple Dipped Strawberries (made by my sister Maggi)
Baby Caleb all dressed up + the favors.
Chocolate mustache molds can be found at Bake It Pretty
Four of my cuties in disguise!