




" " " complate desaign home: vinyl
Showing posts with label vinyl. Show all posts

Saturday, June 4, 2011

COUNTDOWN BLOCKS {Craft}

Remember these?

IMG_5237

I picked them up at Goodwill for like $1 or $2.  I turned them into these countdown blocks.

IMG_5619

I just painted the edges white with some acrylic craft paint.  Then, I used my Silhouette to cut squares of paper to fit on the sides.  I have two blocks with different holidays/events on them.  I used themed paper to go with the holidays.  On the other blocks I used black and white papers.  I saw this idea over on How Does She a long time ago.  I thought it was so cute.  But I wanted it to be for more than just one holiday. 

I used vinyl for the numbers and words.  On one block I have the numbers 0,1,2,3,4,5 and on the other 0,1,2,6,7,8.  You use the 6 as a 9 also.  On the Days ‘til (which is just realized I have the apostrophe in the wrong place!) I also did Weeks ‘Til and Hours ‘Til.  I did all the big holidays, plus summer, birthday, fun, vacation.  The kids are enjoying using them and I think they turned out pretty cute.

To adhere the paper, apply a thin layer of modpodge to the block and add your paper.  use a credit card edge to burnish it down well.  Repeat with all the sides, allowing the ModPodge to dry.  Once it is dry you can then apply a thin layer to the outside of the paper.  This keeps it from bubbling.  Once all the mod podge is dry, you can use a clear spray paint to coat the outsides.  You must do that with modpodge or it will stick to things even once it is dry.  You can then apply your vinyl.  Alternately, you could cut letters and numbers from paper with punches or die cutters or free hand.  You could also use stickers.  If you do paper, attach them with a glue stick or a little ModPodge before you coat the face of the paper with ModPodge. 

IMG_5620

IMG_5621

IMG_5622

IMG_5623

For those in Vegas I saw blocks like these at Marshall’s for like $4 and it was a longer word for maybe 6 or 7 or 8 blocks.  They had a few of them.

COUNTDOWN BLOCKS {Craft}

Remember these?

IMG_5237

I picked them up at Goodwill for like $1 or $2.  I turned them into these countdown blocks.

IMG_5619

I just painted the edges white with some acrylic craft paint.  Then, I used my Silhouette to cut squares of paper to fit on the sides.  I have two blocks with different holidays/events on them.  I used themed paper to go with the holidays.  On the other blocks I used black and white papers.  I saw this idea over on How Does She a long time ago.  I thought it was so cute.  But I wanted it to be for more than just one holiday. 

I used vinyl for the numbers and words.  On one block I have the numbers 0,1,2,3,4,5 and on the other 0,1,2,6,7,8.  You use the 6 as a 9 also.  On the Days ‘til (which is just realized I have the apostrophe in the wrong place!) I also did Weeks ‘Til and Hours ‘Til.  I did all the big holidays, plus summer, birthday, fun, vacation.  The kids are enjoying using them and I think they turned out pretty cute.

To adhere the paper, apply a thin layer of modpodge to the block and add your paper.  use a credit card edge to burnish it down well.  Repeat with all the sides, allowing the ModPodge to dry.  Once it is dry you can then apply a thin layer to the outside of the paper.  This keeps it from bubbling.  Once all the mod podge is dry, you can use a clear spray paint to coat the outsides.  You must do that with modpodge or it will stick to things even once it is dry.  You can then apply your vinyl.  Alternately, you could cut letters and numbers from paper with punches or die cutters or free hand.  You could also use stickers.  If you do paper, attach them with a glue stick or a little ModPodge before you coat the face of the paper with ModPodge. 

IMG_5620

IMG_5621

IMG_5622

IMG_5623

For those in Vegas I saw blocks like these at Marshall’s for like $4 and it was a longer word for maybe 6 or 7 or 8 blocks.  They had a few of them.

Monday, May 23, 2011

LITTLE MAN BABY SHOWER {Party}

Well, the shower went off without a hitch.  I will admit it was a TON of work for me….much more than I anticipated.  I was exhausted by the time the party started!  But I think all the guests had a nice time and enjoyed themselves and hopefully my sister was happy and felt loved. 

So, I am just going to post a ton of pictures from the shower.  I had some trouble taking some of the pictures due to the time of day and lighting in the room.  Hopefully you will still be able to see all the little details.  In the coming days I will post recipes for the food.  Enjoy!

IMG_5335edited

IMG_5346

IMG_5353

How to make this printable HERE

IMG_5357

IMG_5368

IMG_5388

IMG_5358

IMG_5379

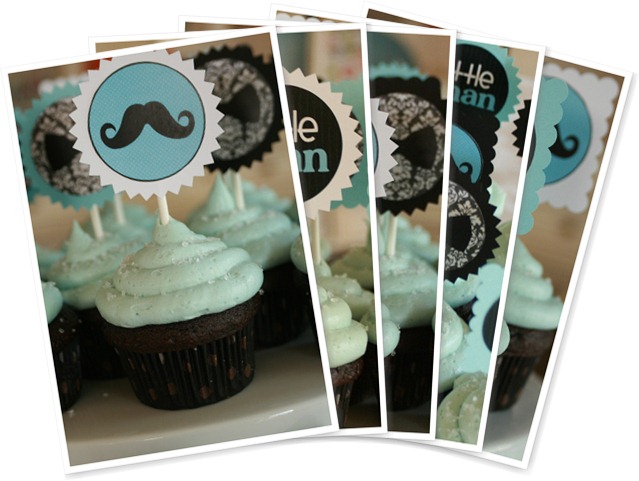
I wanted to do something a little different with the cupcake toppers than I have seen before.  So instead of just scalloped circles I did scalloped squares and pinked circles, each in 3 different colors.  I love how they turned out! HERE is my tutorial on making cupcake topper graphics.

Cupcakes made by my sister Melinda.  We use an icing coupler to pipe the frosting because we could never find a big enough tip.  The coupler is the little white thing that makes it so you can switch out the tips on your pastry bag.  You have to find one without a little notch in it though.

IMG_5393IMG_5394

IMG_5400

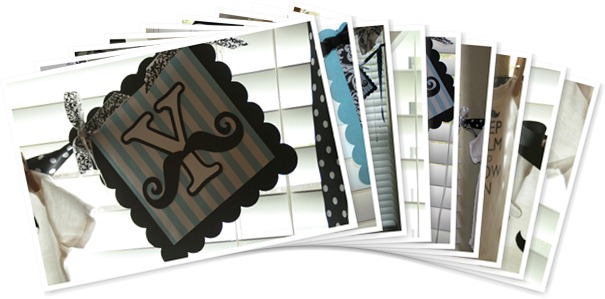
Garland inspired by THIS party.

The onesies were made with heat transfer vinyl I cut on my Silhouette.

IMG_5523

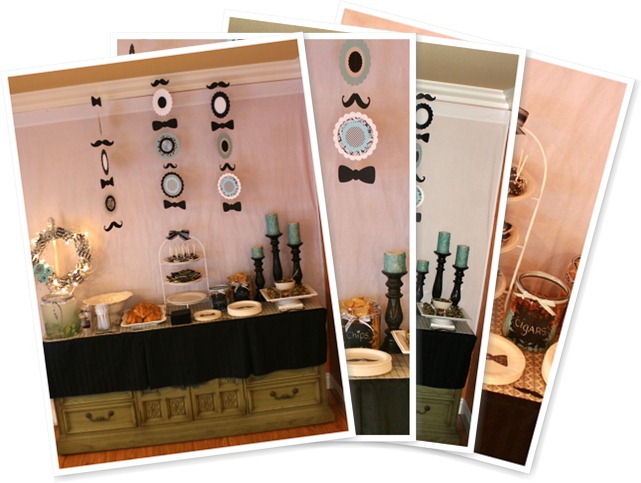
These hanging garlands spun around slowly all night.  Here you are seeing the back side of several of the circles.  I connected the shapes using clear fishing line and clear tape.

IMG_5528

IMG_5530

This was a fall colored wreath that I had spray painted white.  I added the ribbon and fabric rosettes to match my color scheme.  The twinkle lights gave a nice effect during the shower.

IMG_5478

IMG_5370IMG_5373

Vinyl mustaches on plastic cups.

IMG_5262

Stamped paper plates…how to HERE.

IMG_5435

Black Bean and Corn Salsa (Made by my sister Molly)

IMG_5441

IMG_5504

Homemade Chips (made by my sister Molly)

IMG_5471

Italian BOWTIE Pasta Salad (Made by my sister Laura)

IMG_5446

Cucumber Water (SUPER refreshing!)

IMG_5325IMG_5329

Oreo Truffles

IMG_5361IMG_5365

Pretzel “Cigars”

IMG_5427

IMG_5428

Bowtie Sugar Cookies (made with a homemade cookie cutter)

IMG_5475

Triple Dipped Strawberries (made by my sister Maggi)

IMG_5422

Baby Caleb all dressed up + the favors.

IMG_5339IMG_5341

IMG_5344

Chocolate mustache molds can be found at Bake It Pretty

IMG_5513IMG_5516IMG_5519IMG_5520

Four of my cuties in disguise!