





" " " complate desaign home

Thursday, March 31, 2011

Turtle Speed

I am a turtle when it comes to home improvement. While some can slam out a painted room in a day, I take it slow and steady.Perhaps it's because I'm a bit of a perfectionist and I take my time cutting in my paint lines just right, without taping, just using a good angled brush and a steady hand.
Maybe it's because my family needs time to adjust to change. The most common question asked when I'm doing any improvement is, "Why are you changing that???" (When I reply that it's just because I want to, they usually walk away confused.)
Then there is my simple love of savoring change---somewhat like eating a delectable dessert as slowly as possible so it can be enjoyed to it's fullest. I savor those giddy feelings as I watch my project go from an idea in my head to a reality in my home.
Such is the case with my dining room wall. I am delighted with it's transformation from antiqued green to "Blacktop"---the most deep and luscious gray/brown/green.My shelf has been stripped and primed. The antique tin has been released from years of paint, rust, and grime; a look I once loved but am ready for something new. I am so excited to add the final layers of glaze to both projects but it will be done at turtle speed so that both my family and I can appreciate the flavor of change.
Are you a rabbit or a turtle when it comes to home improvement projects?

Turtle Speed

I am a turtle when it comes to home improvement. While some can slam out a painted room in a day, I take it slow and steady.Perhaps it's because I'm a bit of a perfectionist and I take my time cutting in my paint lines just right, without taping, just using a good angled brush and a steady hand.
Maybe it's because my family needs time to adjust to change. The most common question asked when I'm doing any improvement is, "Why are you changing that???" (When I reply that it's just because I want to, they usually walk away confused.)
Then there is my simple love of savoring change---somewhat like eating a delectable dessert as slowly as possible so it can be enjoyed to it's fullest. I savor those giddy feelings as I watch my project go from an idea in my head to a reality in my home.
Such is the case with my dining room wall. I am delighted with it's transformation from antiqued green to "Blacktop"---the most deep and luscious gray/brown/green.My shelf has been stripped and primed. The antique tin has been released from years of paint, rust, and grime; a look I once loved but am ready for something new. I am so excited to add the final layers of glaze to both projects but it will be done at turtle speed so that both my family and I can appreciate the flavor of change.
Are you a rabbit or a turtle when it comes to home improvement projects?

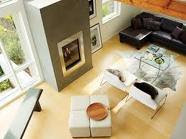
15 Contemporary Living Room Inspiration Photos


15 Contemporary Living Room Inspiration Photos


Wednesday, March 30, 2011

Decoupaged Eggs ~ two looks

Love the way these eggs turn out. Here are two different looks for the same paper, same process. I like using paper mache eggs - so I can display them again next year.

Glittered in Crushed Glass


Tea-Dye Varnished


Start with your paper mache or wooden eggs and prime them. You can find the eggs in different sizes.


Then take some tissue paper and tear it into small pieces 1"-2". I like using an allover pattern such as this pretty floral.


Using, white glue or Mod Podge, start gluing and placing your pieces all over the egg until completely covered.

The next step is going to give you two completely different looks.

You can use a tea-dye varnish for a vintage look. I don't know if this product is still in stores - but anything like it will work - or an acrylic glaze would be fine too. And don't worry about the folds ~ I love how the varnish collects in the creases.


Or german glass glitter for a sparkly egg.


For the finishing touch, I like to add some vintage lace and buttons.


 And paper shreds for display.


Hope you enjoyed the project! Would love to see how you are decorating with eggs this year. Leave a link in the comments for us to visit.


I shared this post with the following link parties:

Saturday Night Special @ Funky Junk Interiors

Decoupaged Eggs ~ two looks

Love the way these eggs turn out. Here are two different looks for the same paper, same process. I like using paper mache eggs - so I can display them again next year.

Glittered in Crushed Glass


Tea-Dye Varnished


Start with your paper mache or wooden eggs and prime them. You can find the eggs in different sizes.


Then take some tissue paper and tear it into small pieces 1"-2". I like using an allover pattern such as this pretty floral.


Using, white glue or Mod Podge, start gluing and placing your pieces all over the egg until completely covered.

The next step is going to give you two completely different looks.

You can use a tea-dye varnish for a vintage look. I don't know if this product is still in stores - but anything like it will work - or an acrylic glaze would be fine too. And don't worry about the folds ~ I love how the varnish collects in the creases.


Or german glass glitter for a sparkly egg.


For the finishing touch, I like to add some vintage lace and buttons.


 And paper shreds for display.


Hope you enjoyed the project! Would love to see how you are decorating with eggs this year. Leave a link in the comments for us to visit.


I shared this post with the following link parties:

Saturday Night Special @ Funky Junk Interiors